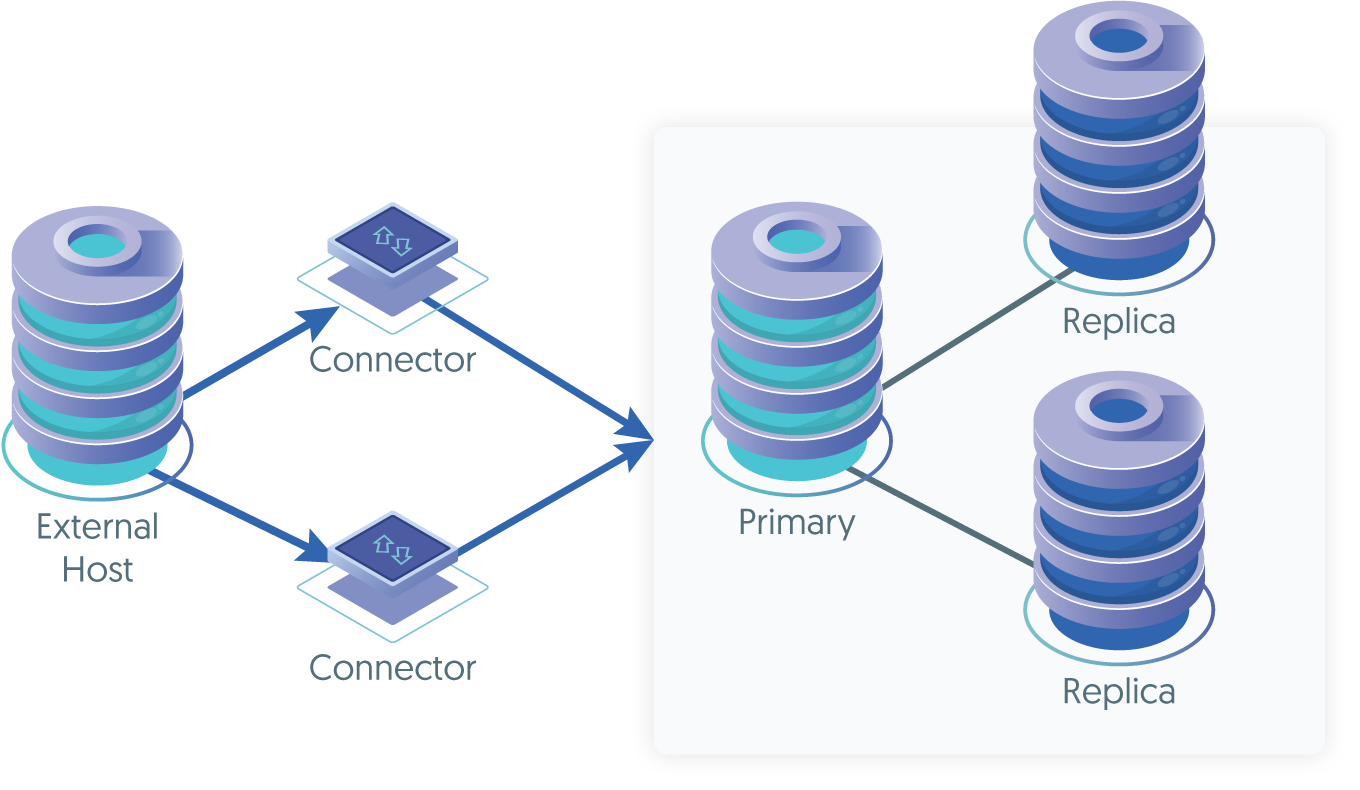
If you have an existing dataservice, data can be replicated from a standalone MySQL server into the service. The replication is configured by creating a service that reads from the standalone MySQL server and writes into the cluster through a connector attached to your dataservice. By writing through the connector, changes to the underlying dataservice topology can be handled.
Using a replicator that writes data into an existing data service can be used when migrating from an existing service into a new Tungsten Cluster service.
For more information on initially provisioning the data for this type of operation, see Section 6.12.2, “Migrating from MySQL Native Replication Using a New Service”.
In order to configure this deployment, there is just on simpe step:
Create a new replicator on the source server that extracts the data from the binary logs, and applies to the target cluster using a special
directtopology.
There are also the following requirements:
If Tungsten Cluster™ is in use on the target, then you must use the same version of Tungsten Replicator™ that matches the version runnning in the Cluster.
Hosts on both the replicator and cluster must be able to communicate with each other.
The replication user on the source host must have the
RELOAD,REPLICATION SLAVE, andREPLICATION CLIENTprivileges.Replicator must be able to connect as the
tungstenuser to the databases within the cluster.When writing into the Primary through the connector, the user must be given the correct privileges to write and update the MySQL server. For this reason, the easiest method is to use the
tungstenuser, and ensure that that user has been added to theuser.map:tungsten secret alpha
Install the Tungsten Replicator™ package (see
Section 2.2.2, “Using the RPM package files”), or download the compressed
tarball and unpack it on host1:
shell>cd /opt/continuent/softwareshell>tar zxf tungsten-replicator-7.0.3-141.tar.gz
Change to the Tungsten Replicator staging directory:
shell> cd tungsten-replicator-7.0.3-141
Configure the replicator on host1
Create the /etc/tungsten/tungsten.ini using the example below
as a template. Once created to suit your needs, run tpm to
perform the installation.
shell> vi /etc/tungsten/tungsten.ini[defaults] install-directory=/opt/continuent user=tungsten skip-validation-check=MySQLNoMySQLReplicationCheck rest-api-admin-user=apiuser rest-api-admin-password=secret replicator-rest-api-address=0.0.0.0 log-slave-updates=true[beta] topology=direct master=host1 direct-datasource-host=host1 direct-replication-port=3306 replication-host=connectorhost1 replication-user=tungsten replication-password=secret replication-port=3306
Configuration group defaults
The description of each of the options is shown below; click the icon to hide this detail:
install-directory=/opt/continuentPath to the directory where the active deployment will be installed. The configured directory will contain the software, THL and relay log information unless configured otherwise.
System User
skip-validation-check=MySQLNoMySQLReplicationCheckThe
skip-validation-checkdisables a given validation check. If any validation check fails, the installation, validation or configuration will automatically stop.Warning
Using this option enables you to bypass the specified check, although skipping a check may lead to an invalid or non-working configuration.
You can identify a given check if an error or warning has been raised during configuration. For example, the default table type check:
ERROR >> centos >> The datasource root@centos:3306 (WITH PASSWORD) »
 uses MyISAM as the default storage engine (MySQLDefaultTableTypeCheck)
The check in this case is
MySQLDefaultTableTypeCheck, and could be ignored usingskip-validation-check=MySQLDefaultTableTypeCheck.Values can be passed as a comma-separated list, or single
skip-validation-checkentries for each check to be skipped.Setting both
skip-validation-checkandenable-validation-checkis equivalent to explicitly disabling the specified check.- Optional: Must be specified along with rest-api-admin-pass if you wish to access the full API features and use the Dashboard GUI for cluster installations.
- Optional: Must be specified along with rest-api-admin-user if you wish to access the full API features.
replicator-rest-api-address=0.0.0.0Address for the API to bind too.
Should replicas log updates to binlog
Configuration group beta
The description of each of the options is shown below; click the icon to hide this detail:
Replication topology for the dataservice.
The hostname of the primary (extractor) within the current service.
Database server hostname
Database server port
replication-host=connectorhost1Hostname of the datasource where the database is located. If the specified hostname matches the current host or member name, the database is assumed to be local. If the hostnames do not match, extraction is assumed to be via remote access. For MySQL hosts, this configures a remote replication Replica (relay) connection.
For databases that required authentication, the username to use when connecting to the database using the corresponding connection method (native, JDBC, etc.).
The password to be used when connecting to the database using the corresponding
--replication-user.The network port used to connect to the database server. The default port used depends on the database being configured.
This creates a configuration that specifies that the topology should read
directly from the source host, host1,
writing directly to connectorhost1.
This assumes the replicator is being installed on the source host, host1.
Now install the service using tpm:
shell> ./tools/tpm install
If the installation process fails, check the output of the
/tmp/tungsten-configure.log file for
more information about the root cause.
Once the installation has been completed, you can start the replicator as follows:
shell> replicator start
By default the replicator will start from the current binlog position. If you need to start from a different position, you can do this as follows:
shell> replicator start offline
Next, using the binary log and position you want to start from, you can position
the replicators starting position. For example, you have determined that
the starting point is binary log file mysql-bin.000011
and position 758, then using the index of
the filename and position, execute the following command:
shell> trepctl online -from-event 000011:758
You can now monitor replication using the status command:
shell> trepctl status
Processing status command...
NAME                     VALUE
----                     -----
appliedLastEventId     : mysql-bin.000011:0000000000003988;156
appliedLastGoodLatency : 171.866
appliedLastGoodSeqno   : 8
appliedLastSeqno       : 8
appliedLatency         : 171.866
autoRecoveryEnabled    : false
autoRecoveryTotal      : 0
channels               : 1
clusterName            : beta
currentEventId         : mysql-bin.000012:0000000000000157
currentTimeMillis      : 1737546857700
dataServerHost         : connectorhost1
extensions             :
host                   : host1
latestEpochNumber      : 0
masterConnectUri       : null
masterListenUri        : null
maximumStoredSeqNo     : 8
minimumStoredSeqNo     : 0
offlineRequests        : NONE
pendingError           : NONE
pendingErrorCode       : NONE
pendingErrorEventId    : NONE
pendingErrorSeqno      : -1
pendingExceptionMessage: NONE
pipelineSource         : jdbc:mysql:thin://host1:13306/
relativeLatency        : 378.7
resourceJdbcDriver     : org.drizzle.jdbc.DrizzleDriver
resourceJdbcUrl        : jdbc:mysql:thin://connectorhost1:3306/${DBNAME}?jdbcCompliantTruncation=false&zeroDateTimeBehavior=convertToNull&tinyInt1isBit=false&allowMultiQueries=true&yearIsDateType=false
resourceVendor         : mysql
rmiPort                : 10002
role                   : direct
seqnoType              : java.lang.Long
serviceName            : beta
serviceType            : local
simpleServiceName      : beta
siteName               : default
sourceId               : host1
state                  : ONLINE
timeInStateSeconds     : 208.04
timezone               : GMT
transitioningTo        :
uptimeSeconds          : 333.742
useSSLConnection       : false
version                : Tungsten Replicator 7.0.3 build 141
Finished status command...